
How to Repair a Chipped Granite Countertop
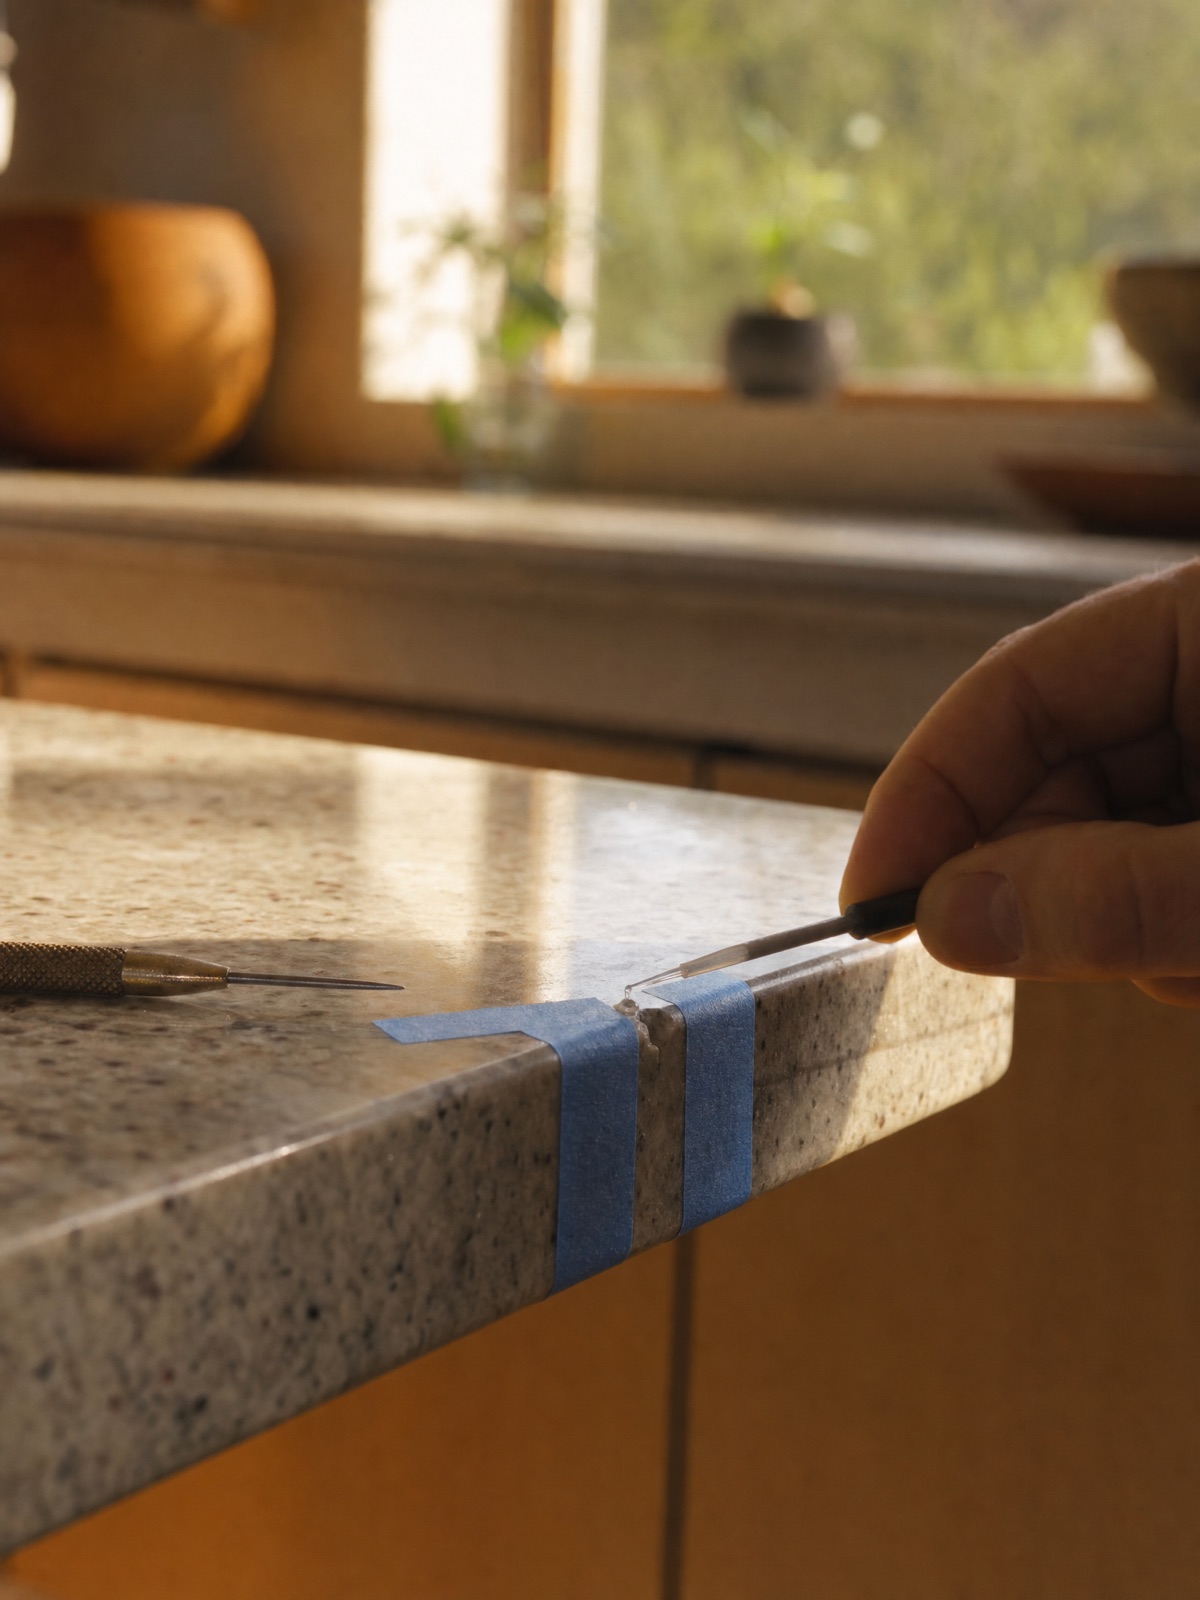
Granite is one of the hardest surfaces in the kitchen, but it is not indestructible — a dropped pan or a knock against an exposed corner can take a small chip out of the edge or surface. The good news is that a small, shallow chip is often a reasonable do-it-yourself fix with a colour-matched or clear epoxy, and a tidy repair can be nearly invisible. The honest news, which most repair guides skip, is that plenty of chips are not good DIY candidates: large breaks, chips on a finished edge or near a seam or sink cut-out, and anything structural are jobs for a fabricator with the right colour-matched resins and tools. This guide covers the DIY fix step by step and, just as importantly, tells you when to stop and call a professional.
What you’ll need
- A clear or colour-matched countertop or stone epoxy (two-part epoxy or a granite repair kit)
- Acetone and a clean cloth for cleaning the chip
- Painter’s tape to mask the edges around the chip
- A razor blade or fine putty knife for levelling and, later, shaving off excess
- Toothpicks or a small mixing stick, and a disposable surface for mixing
- Fine-grit wet/dry sandpaper (high grit, around 400–600) for smoothing, if the product calls for it
- Optional: tinting pigments to match a multi-colour granite, often included in repair kits
If you do not already know your granite is well sealed and you are unsure about colour matching, it is worth getting a fabricator’s read before filling — see the “when to call a professional” section.
Step-by-step: filling a small granite chip
- Clean and dry the chip completely. Wipe the chip and the area around it with a little acetone on a cloth to remove grease, food, and any old residue, and let it dry fully. Epoxy will not bond to a dirty or damp surface, and trapped moisture is a common reason a repair fails.
- Mask around the chip. Press painter’s tape down on the stone right up to the edges of the chip, leaving only the void exposed. This keeps epoxy off the surrounding polish and makes cleanup far easier.
- Mix the epoxy (and tint it, if needed). Mix the two-part epoxy on a disposable surface per the product’s ratio. For a single-colour granite, a clear epoxy or a close pre-matched shade works well. For a multi-colour or speckled stone, add tinting pigments a little at a time until the blend reads close to the surrounding stone — aim to match the dominant background tone, since perfect speckle matching is rarely achievable by hand.
- Fill the chip slightly proud. Use a toothpick or small stick to work the epoxy into the void, pressing it in to avoid air pockets and filling it so it sits just slightly above the surface. Epoxy can shrink a touch as it cures, and it is much easier to shave off a small excess than to add a second layer.
- Level and let it cure. Draw a razor blade or putty knife flat across the top to strike off the excess while the epoxy is still workable. Then leave it to cure fully — follow the product’s stated cure time, which can run several hours to overnight. Do not rush this.
- Shave, sand, and remove the tape. Once fully cured, gently shave any remaining high spot flush with a razor held nearly flat. If the product allows, lightly smooth with high-grit wet sandpaper, using water and a very light touch to avoid dulling the surrounding polish. Peel away the tape. Clean the area with warm soapy water.
Done carefully on a small chip, this leaves a repair that is hard to spot unless you know where to look. If your granite’s seal is due anyway, reseal after the repair has fully cured.
What to avoid
- Over-filling without masking. Epoxy that cures onto the surrounding polish is hard to remove without marring the finish. Tape first.
- Rushing the cure. Shaving or using the counter before the epoxy has set produces a smeared, weak repair. Wait the full stated time.
- Aggressive sanding. Heavy or dry sanding around the chip will dull the polished granite. Keep it high-grit, wet, and light, or skip it.
- Filling a chip that is really a crack. A chip is a missing piece; a crack is a line that can run and spread under load. Epoxy in a crack is not a structural fix — that is a professional assessment, covered in our countertop repair guide.
- Expecting an invisible result on a large or edge chip. The bigger and more visible the chip, the harder a hand repair is to hide — and the more a fabricator’s tools and matched resins are worth it.
DIY chip versus a fabricator’s job
Being honest about the limits is the whole point. Here is roughly where the line sits.
Reasonable DIY: a small, shallow chip (think a few millimetres) on a flat surface or a non-critical spot, on a single-colour or forgivingly patterned granite, where a near-match epoxy fill will satisfy you. Most homeowners can do this well with patience.
Call a fabricator when:
- The chip is large, deep, or has taken a visible bite out of the stone.
- It is on a finished edge or corner — edges are shaped and polished, and matching that profile is a fabrication skill, not a fill.
- It is near a seam, a sink cut-out, or a cooktop cut-out, where the stone is thinner and more stressed and a poor repair can lead to a crack.
- You see a crack rather than a chip, or the piece feels loose.
- The granite is a dramatic multi-colour or veined slab where a hand-tinted fill will stand out.
- You simply want it to be invisible — fabricators carry colour-matched stone resins and the tooling to blend a repair far beyond what a kit allows.
A fabricator can also tell you something a kit cannot: whether the chip is cosmetic or a sign of a larger problem with how the slab is supported. That assessment alone is often worth the call.
When to call a professional
If your chip falls into any of the categories above — large, on an edge, near a seam or cut-out, on a busy stone, or accompanied by a crack — bring in a professional rather than risk making it harder to fix later. Alpine Countertops fabricates granite in our own Richmond facility, so we have the colour-matched resins, edge tooling, and slab knowledge to repair or, where a repair is not the right answer, advise honestly on the options. We would rather tell you a chip is an easy DIY than sell you work you do not need.
Frequently asked questions
Can I repair a granite chip myself?
Often, yes, if it is small and shallow and on a flat or non-critical area. A clear or colour-matched stone epoxy, applied to a clean, dry, masked chip and cured fully, can make a small chip nearly invisible. Large chips, edge and corner chips, and anything near a seam or cut-out are better left to a fabricator.
What kind of epoxy should I use on granite?
A two-part countertop or stone epoxy, or a purpose-made granite repair kit. Use clear epoxy or a close pre-matched shade on single-colour granite; on speckled or multi-colour stone, tint the epoxy to match the dominant background tone. Match the product to your stone and follow its mixing ratio and cure time.
Will a DIY chip repair be invisible?
On a small chip in a forgiving stone, a careful repair can be very hard to spot. On a large chip, a finished edge, or a dramatic multi-colour granite, a hand repair is more likely to show — that is exactly where a fabricator’s colour-matched resins and tools make the difference.
Is a chip the same as a crack?
No. A chip is a missing piece of stone, usually cosmetic and often DIY-repairable. A crack is a line that can spread under load and is a structural concern, especially near a sink or cooktop cut-out. Do not treat a crack with a chip-fill kit; have it assessed. Our countertop repair guide explains the difference.
This guide is part of our Granite Countertop Care & Maintenance Guide →
Get help from Alpine
If your granite chip is anything more than small and cosmetic, or you want a repair done so it disappears, we can help. Alpine Countertops fabricates in our own Richmond facility and serves Metro Vancouver and the Fraser Valley with our own crews. Call 604-630-5700 or email info@alpinecountertops.com, or reach us through our contact page.